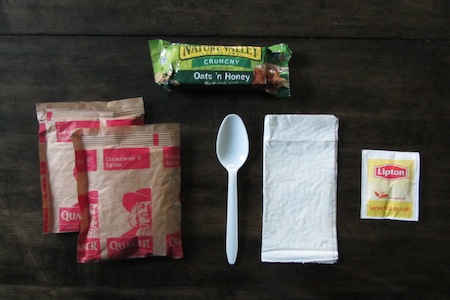
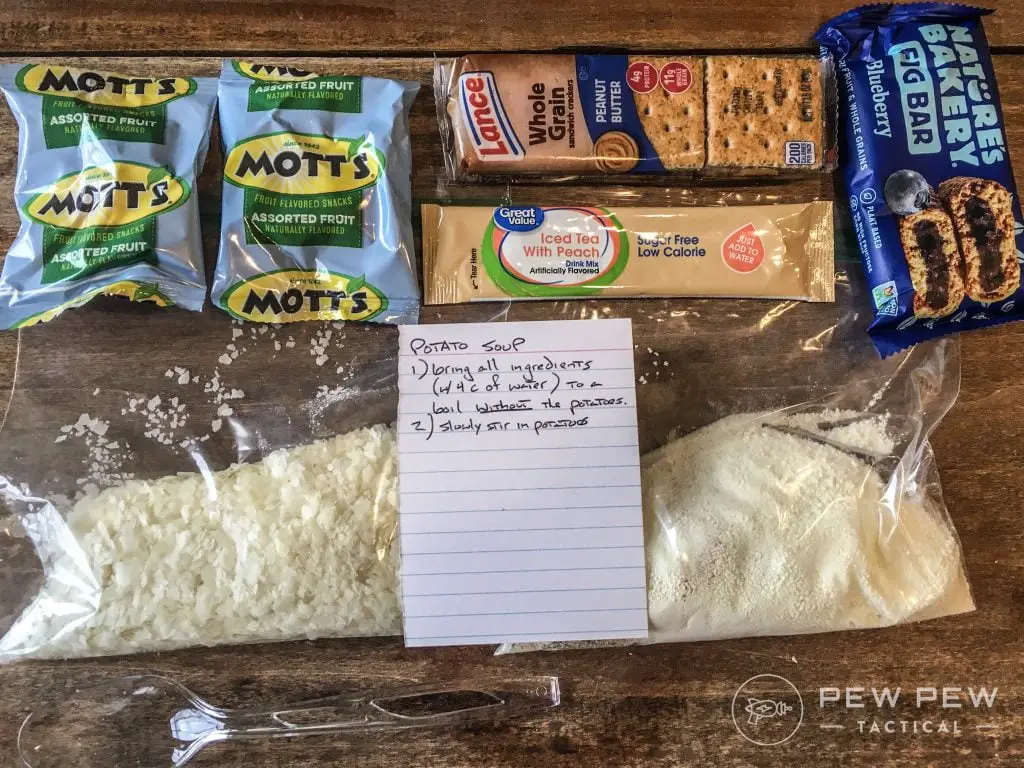
Welcome to your ultimate guide to homemade MREs (Meals Ready to Eat)! In this article, you will learn how to prepare convenient and delicious meals that are perfect for on-the-go or emergency situations. With our easy-to-follow recipes and tips, you will be able to create your own custom MREs that are both budget-friendly and tasty. Say goodbye to bland and boring store-bought options and say hello to homemade MREs that will keep you satisfied no matter where your adventures take you. Let’s get started on your journey to creating the perfect homemade MREs! Have you ever found yourself in a situation where you needed a quick, convenient meal while on the go? Whether you’re heading out on a camping trip, a long hike, or just want to be prepared for emergencies, homemade Meals Ready to Eat (MREs) are a great option. In this friendly guide, we’ll show you how to create your own homemade MREs that are not only delicious but also cost-effective and customizable to your dietary needs. Let’s get started!

What are Homemade MREs?
Homemade MREs, or Meals Ready to Eat, are pre-packaged meals that require little to no preparation to eat. These meals are designed to be easily transported and have a long shelf life, making them perfect for outdoor activities, emergencies, or any situation where you need a quick and convenient meal.
Creating your own homemade MREs allows you to customize the meals to your liking, ensuring that you have meals you enjoy and meet your dietary needs. Plus, making your own MREs can save you money compared to purchasing commercially prepared options.
Why Make Your Own MREs?
Making your own MREs gives you full control over the ingredients used in your meals. You can choose high-quality, fresh ingredients and avoid preservatives and additives often found in commercially prepared MREs. Additionally, making your own MREs allows you to customize the meals to your taste preferences and dietary restrictions.
By creating your own homemade MREs, you can ensure that you have nutritious, delicious meals on hand whenever you need them. Plus, the cost savings of making your own MREs can add up over time, making it a budget-friendly option for meal preparation.
Supplies Needed to Make Homemade MREs
Before you start creating your own homemade MREs, you’ll need to gather some essential supplies. Here’s a list of the supplies you’ll need to get started:
| Supplies | Description |
|---|---|
| Food items | Choose a variety of shelf-stable foods such as canned meats, dried fruits, nuts, granola bars, crackers, and other non-perishable items. |
| Packaging materials | Use resealable plastic bags, vacuum-sealed bags, or Mylar bags to package your meals. Ensure the packaging is airtight to extend the shelf life of your homemade MREs. |
| Labels | Label each meal with the contents and date prepared to keep track of the shelf life of your homemade MREs. |
| MRE heater | Optional, but recommended for heating meals on the go. These heaters are activated with water and can heat your meal without needing a flame or stove. |
Where to Find Supplies
You can find the supplies needed to make homemade MREs at your local grocery store, camping supply store, or online retailers. Look for ingredients that are shelf-stable and have a long shelf life to ensure your homemade MREs stay fresh for an extended period.
When choosing packaging materials, opt for durable, airtight bags that will protect your meals from moisture and contaminants. Labels can be purchased at office supply stores or online, or you can create your own labels using paper and tape.
Choosing Ingredients for Homemade MREs
When selecting ingredients for your homemade MREs, choose a variety of foods to create balanced, nutritious meals that you enjoy. Consider the following factors when choosing ingredients:
Nutritional Value
Include a mix of protein, carbohydrates, fats, vitamins, and minerals in each meal to ensure you’re getting a balanced meal. Choose lean proteins such as canned tuna, chicken, or beef, and incorporate whole grains, fruits, and vegetables for added nutrients.
Shelf Stability
Select shelf-stable foods with a long shelf life to ensure your homemade MREs stay fresh for an extended period. Look for items that are pre-cooked, dehydrated, or canned, as these foods have a longer shelf life than fresh ingredients.
Taste and Preference
Choose foods that you enjoy eating and that will provide you with the energy you need for your activities. Consider your taste preferences and dietary restrictions when selecting ingredients for your homemade MREs.
Assembling Your Homemade MREs
Once you have gathered your supplies and selected your ingredients, it’s time to assemble your homemade MREs. Follow these steps to create your own Meals Ready to Eat:
-
Prepare the ingredients: Open and drain canned foods, portion out snacks, and gather all the items you plan to include in each meal.
-
Package the meals: Place each food item in a resealable plastic bag, vacuum-sealed bag, or Mylar bag. Ensure the packaging is airtight to extend the shelf life of your homemade MREs.
-
Label the meals: Label each meal with the contents and date prepared using a permanent marker or pre-made labels. This will help you keep track of the meals’ shelf life and contents.
-
Include heating instructions: If you include items that need to be heated, such as canned soups or meats, consider adding instructions on how to heat the meal using an MRE heater or other heating method.
-
Store the meals: Place your homemade MREs in a cool, dry place away from direct sunlight and extreme temperatures. Check the packaging for any signs of moisture or damage regularly to ensure the meals remain fresh.

Meal Ideas for Homemade MREs
Creating homemade MREs allows you to customize your meals to your liking. Here are some meal ideas to inspire your homemade MRE creations:
Breakfast MRE
- Instant oatmeal packets
- Dried fruit and nut mix
- Protein bars
- Instant coffee or tea
Lunch MRE
- Canned tuna or chicken
- Crackers or tortillas
- Nut butter or cheese spread
- Granola bars
- Fruit cups or applesauce
Dinner MRE
- Canned soup or chili
- Instant rice or pasta
- Canned vegetables
- Beef jerky or sausage
- Dessert item, such as cookies or chocolate
Feel free to mix and match ingredients to create meals that suit your taste preferences and dietary needs. Experiment with different combinations to find your favorite homemade MRE recipes.
Storing and Shelf Life of Homemade MREs
Properly storing your homemade MREs is essential to ensure they remain fresh and safe to eat. Follow these tips to store your Meals Ready to Eat:
Storage Conditions
Store your homemade MREs in a cool, dry place away from direct sunlight and extreme temperatures. Avoid storing your meals in areas prone to moisture, such as basements or garages, as this can reduce the shelf life of your homemade MREs.
Shelf Life
The shelf life of homemade MREs will vary depending on the ingredients used and storage conditions. In general, homemade MREs can last for 3-5 years when stored in optimal conditions. Check the packaging and contents regularly for any signs of spoilage or damage.
Rotation
To ensure the freshness of your homemade MREs, rotate your stock regularly by using and replacing meals as needed. Keep track of the contents and dates of preparation on each meal to help you monitor the shelf life of your homemade MREs.

Conclusion
Creating your own homemade MREs is a convenient, cost-effective way to ensure you have nutritious meals on hand for outdoor adventures, emergencies, or situations where you need a quick meal. By following this friendly guide and using quality ingredients, you can create delicious and balanced Meals Ready to Eat that meet your dietary needs and taste preferences.
Experiment with different ingredients and meal combinations to find your favorite homemade MRE recipes. Don’t forget to store your homemade MREs properly and monitor their shelf life to ensure they remain fresh and safe to eat. With a little preparation and creativity, you can enjoy delicious homemade MREs wherever your adventures take you. Happy meal prepping!
